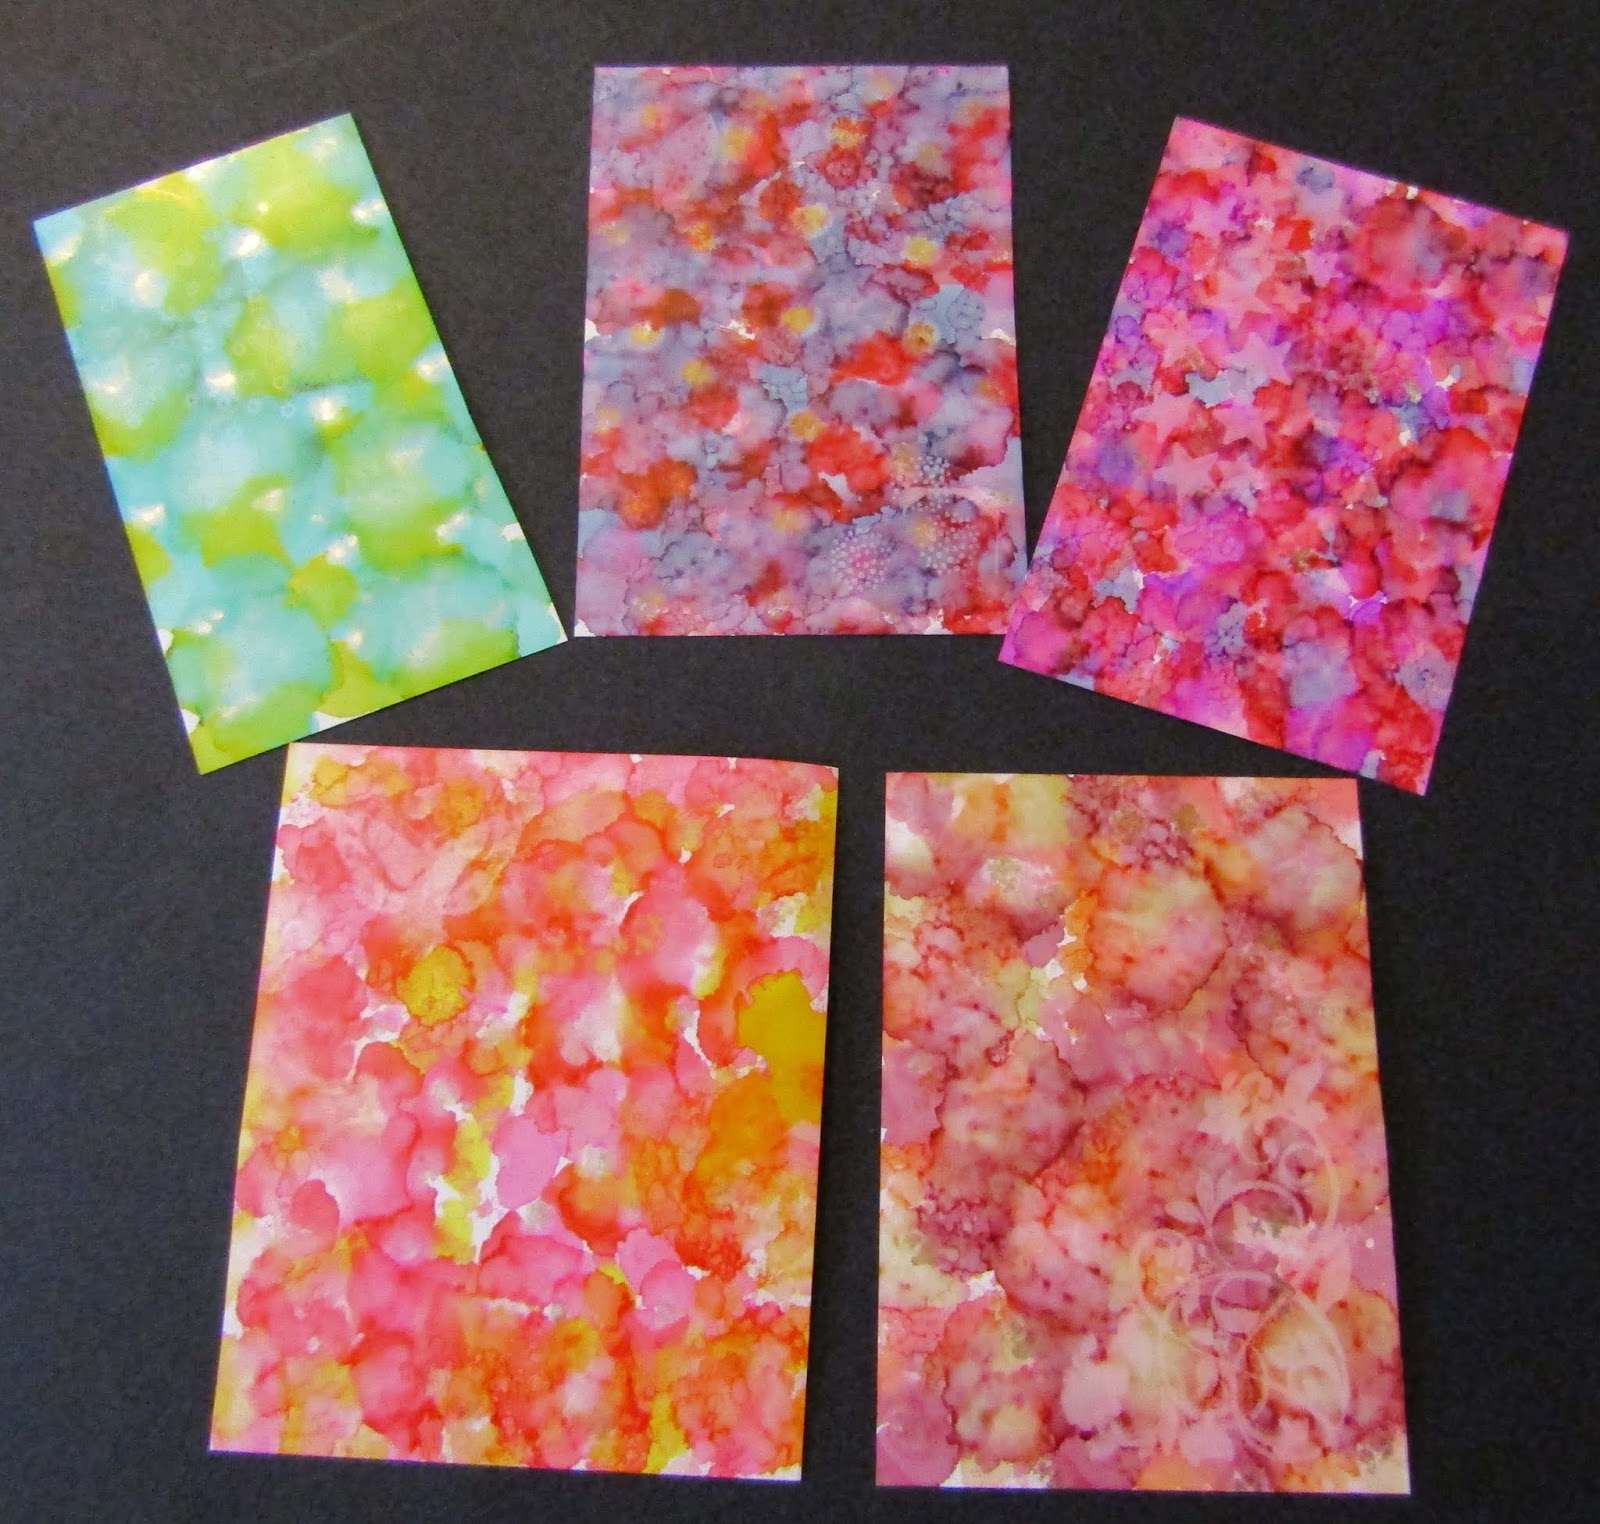
I have been playing with my alcohol inks, Yupo paper and lift ink again. The other experiments can be seen here. It is really quick to do and I am enjoying experimenting to see what effects I can get.
This one has been stamped with the lift ink and then...
...the stamp was stamped onto some white paper (this was the back of an envelope!) Two interesting effects for the price of one!
I used a stencil and the lift ink re-inker sponged through to create the distorted chess board pattern. It's quite subtle and I really like it.
This one has been stencilled with swirls using the lift ink and then has been stamped. I gently heat set the ink as I didn't want to melt the Yupo paper. I may use these for cards as they are, or die cut them. Whatever they are used for, I think they will work well.
Showing posts with label alcohol ink. Show all posts
Sunday, 24 March 2019
Saturday, 9 March 2019
I don't like rotary cutting but I do like alcohol inks
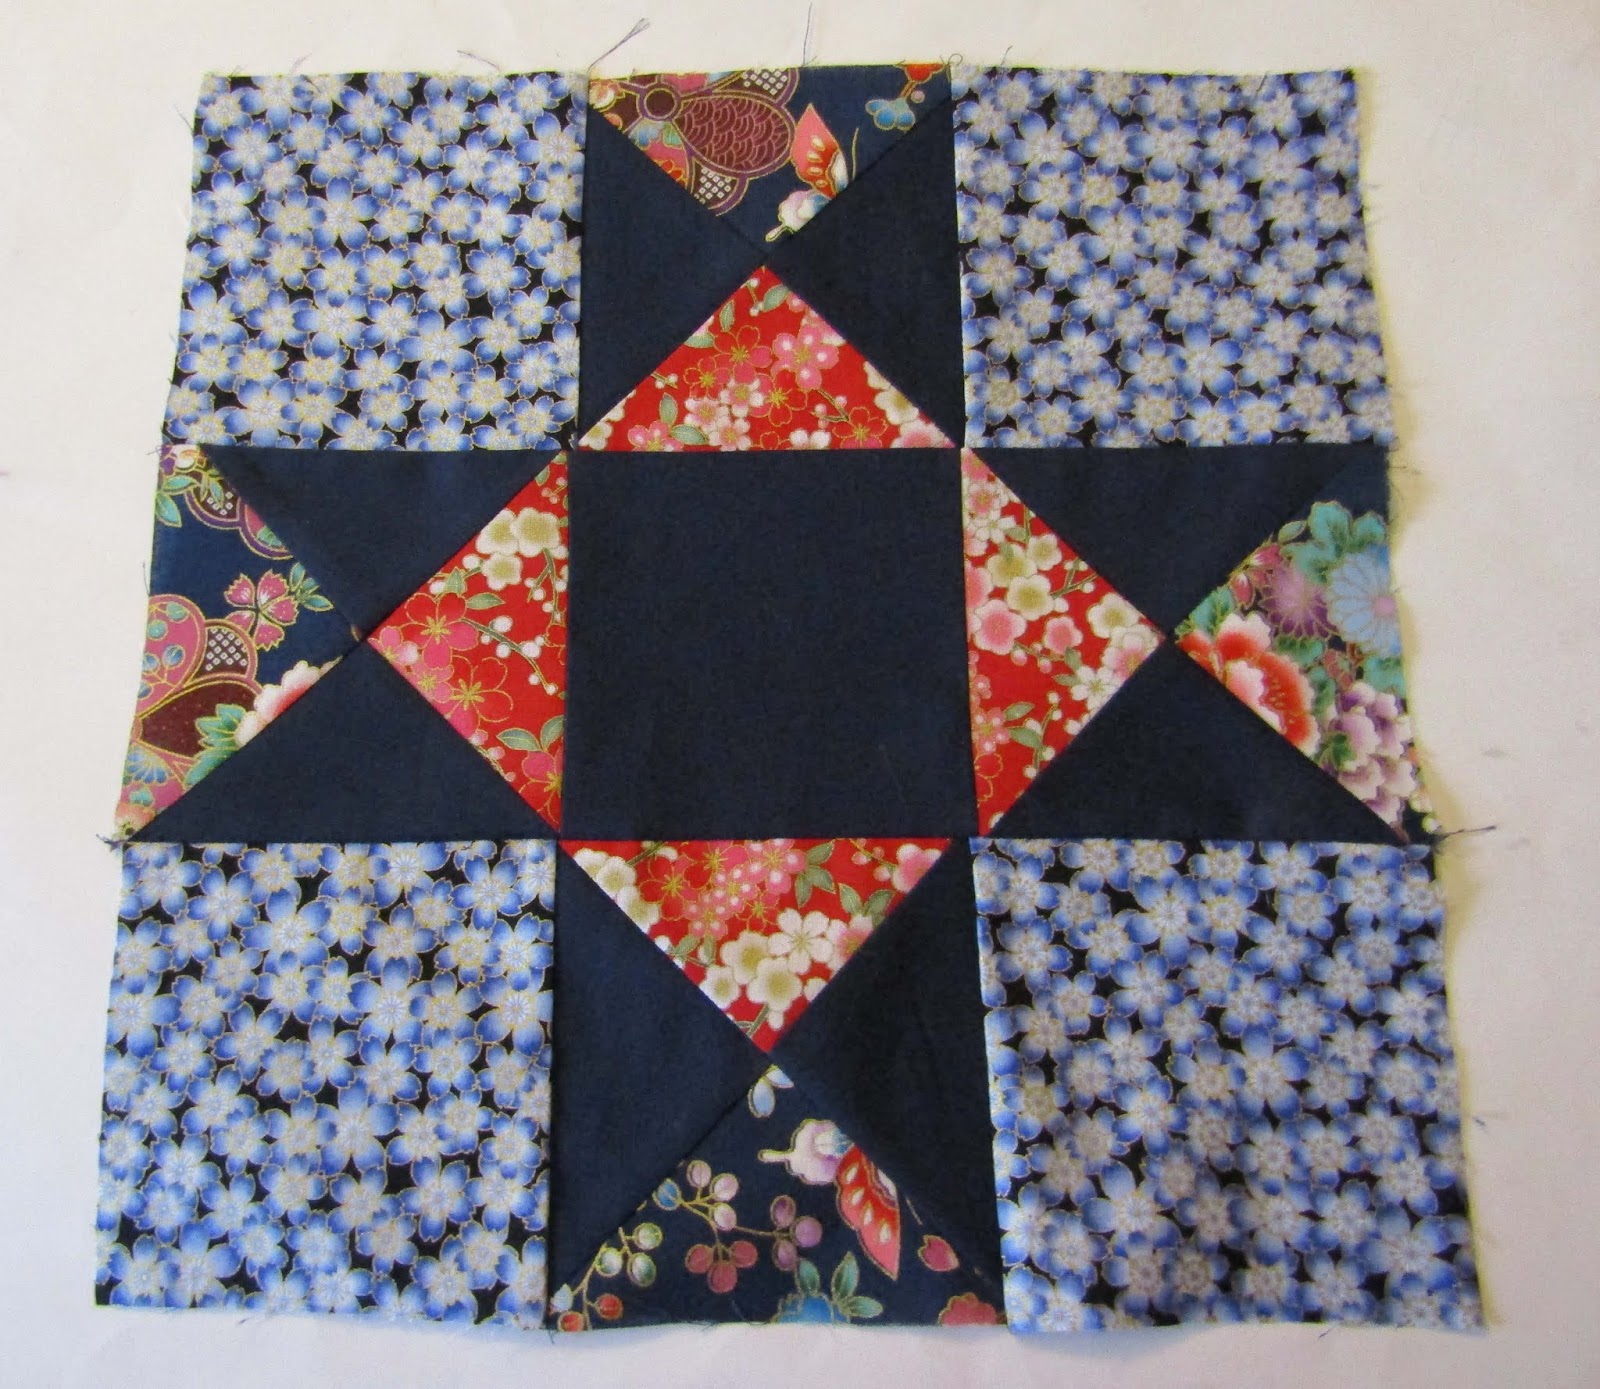
I have completed the 'Ohio Star' block from the pattern for my first ever patchwork quilt. I discovered several things from this experience:
1. I do not like using a rotary cutter. My ruler kept slipping on the fabric and so I knew that as my cutting was not accurate in the slightest, there was not a hope of my seams lining up, and so it proved to be.
2. The navy blue contrast material had a surprising amount of stretch in it, which was not helpful when I needed to cut squares diagonally to make half square triangles.
3. The pattern, although it says it is suitable for a beginner, in my view is a little more challenging than that as it requires quite a bit of rotary cutting (see point 1).
4. I shall stick to using pre-cuts or jelly rolls for future projects. (This will remove the issue of point 1).
5. I shall finish this project as it is a good learning experience, but it will not be perfect in any way. However, I will still be proud because I made it!
In other more positive news, I have been enjoying becoming re-acquainted with alcohol inks. I originally bought them when I was using polymer clay regularly, but since I got sidetracked into other crafts, they had been somewhat forgotten. I got some Yupo paper (a synthetic paper which the inks sit on the surface of) and some Lift ink, and off I went. It was exciting to see what the colours would do. I added some metallics into the mix as well. I loved the vibrancy of the colours. (Being alcohol, there are a few safety issues to be aware of - well ventilated room, wear gloves, don't breathe in the fumes and never put alcohol ink or blending solution in a mister to spray - it's flammable and there is resin in the solutions which could get into your lungs). However, all the precautions are more than worth it for the great results (in my opinion).
These closeups show the effect of the Lift ink, which is applied to a rubber stamp and stamped onto the alcohol ink, holding it on the ink for a few seconds. The ink lifts off the colour. You can then use the rubber stamp to print onto normal card, which transfers the image with those lovely colours.
The bleaching effect is more noticeable with darker or more intense colours. I will be doing much more with my alcohol inks now and using what I create in cards and mixed media projects.
1. I do not like using a rotary cutter. My ruler kept slipping on the fabric and so I knew that as my cutting was not accurate in the slightest, there was not a hope of my seams lining up, and so it proved to be.
2. The navy blue contrast material had a surprising amount of stretch in it, which was not helpful when I needed to cut squares diagonally to make half square triangles.
3. The pattern, although it says it is suitable for a beginner, in my view is a little more challenging than that as it requires quite a bit of rotary cutting (see point 1).
4. I shall stick to using pre-cuts or jelly rolls for future projects. (This will remove the issue of point 1).
5. I shall finish this project as it is a good learning experience, but it will not be perfect in any way. However, I will still be proud because I made it!
In other more positive news, I have been enjoying becoming re-acquainted with alcohol inks. I originally bought them when I was using polymer clay regularly, but since I got sidetracked into other crafts, they had been somewhat forgotten. I got some Yupo paper (a synthetic paper which the inks sit on the surface of) and some Lift ink, and off I went. It was exciting to see what the colours would do. I added some metallics into the mix as well. I loved the vibrancy of the colours. (Being alcohol, there are a few safety issues to be aware of - well ventilated room, wear gloves, don't breathe in the fumes and never put alcohol ink or blending solution in a mister to spray - it's flammable and there is resin in the solutions which could get into your lungs). However, all the precautions are more than worth it for the great results (in my opinion).
These closeups show the effect of the Lift ink, which is applied to a rubber stamp and stamped onto the alcohol ink, holding it on the ink for a few seconds. The ink lifts off the colour. You can then use the rubber stamp to print onto normal card, which transfers the image with those lovely colours.
The bleaching effect is more noticeable with darker or more intense colours. I will be doing much more with my alcohol inks now and using what I create in cards and mixed media projects.
Labels:
alcohol ink,
alcohol inks,
Lift ink,
Ohio Star,
patchwork quilt,
rubber stamps
Thursday, 20 August 2015
Experimenting...try, try again!
You know how sometimes you see a technique being demonstrated and think. "Ooh, I need to have a go at that!"? Well, this happened to me with a faux dichroic glass technique being demonstrated using translucent polymer clay, gilding flakes and alcohol inks. I had all the equipment needed, so off I went.
All was going well - the alcohol inks gave lovely colours over the gilding flakes and I started to smooth the pieces on the surface, when the alcohol ink came off on the cling film and I was left with faded and washed out colours.This small square piece came out best, with two areas where the colour stayed put.
I ended up painting this one with metallic acrylic paint to try and put some colour back. "Oh well", I thought, "I need to leave the alcohol ink to dry for longer next time". So, for the next attempt, I left the ink on the surface for most of a day and overnight, just to make sure.
Guess what happened? Yes, the ink still came off and I was left with washed out looking colours with the blue and green.
The pink, red and yellow colours stayed on a little better and were stronger pigments.
This was another experiment using the scrap bits and pieces. I do like the slightly muted and aged-looking colours.
So, my next step is to try again with foil rather than gilding flakes and perhaps also with paint, just to test the effects. I also need to try using stronger alcohol ink colours. I would love to be successful with the technique, so I shall keep trying.
Labels:
alcohol ink,
faux dichroic glass,
foil,
gilding flakes,
polymer clay
Subscribe to:
Posts (Atom)